Are you considering installing a septic system on your property? This step-by-step guide will walk you through the process of correctly installing a septic tank, ensuring proper water and sewage management. We’ll cover essential aspects like choosing the right tank, excavating the site, and setting up the drain field.
By following this guide, you’ll learn how to install a septic system that complies with regulations and functions efficiently for years to come.
Key Takeaways
Understanding Septic Systems and Their Components

Septic systems are crucial for proper sewage treatment in areas without municipal plumbing. Understanding their main parts, function, and types suitable for different properties is essential for effective Septic Tank Maintenance, installation and maintenance.
This section explores the key components of septic systems, how they work to manage waste, and the various options available based on soil conditions and drainage requirements in Septic Drain Fields.
Main Parts of a Septic System
A septic system consists of several key components that work together to manage household waste effectively. The main parts include a septic tank, where Septic Tank Maintenance is initially collected and separated, and a drain field, which disperses treated wastewater into the soil. Connecting these components are pipes that transport waste from the house to the tank and then to the Septic Drain Fields.
Before installation, a percolation test is conducted to determine the soil‘s ability to absorb water, which influences the septic tank maintenance system’s design. In some cases, a pump may be necessary to move wastewater from the tank to the septic drain fields, especially if the terrain doesn’t allow for gravity flow. Understanding these components is crucial for proper septic system installation and maintenance.
How Septic Systems Function
Septic Tank Inspections systems function through a carefully orchestrated process, starting with wastewater flowing from the house into the septic tank. Inside the tank, solid waste settles at the bottom, forming sludge, while lighter materials float to the top as scum. The remaining liquid, called effluent, flows out of the tank and into the Septic Drain Fields for further treatment.
In the drain field, the effluent percolates through layers of soil and sand, which act as natural filters. This process removes harmful bacteria and nutrients before the treated water rejoins the groundwater. Septic Drain Fields installers and plumbers work together to ensure proper system design and installation, often using heavy equipment to excavate and place components accurately for optimal function.
Types of Septic Systems Suitable for Your Property
Septic systems come in various types, each suited to different property conditions. Conventional systems, featuring a concrete tank and trench-style drain field, are common for properties with suitable soil and adequate space. For areas with high water tables or poor soil conditions, alternative systems like mound or aerobic treatment units may be necessary, often using plastic components for durability.
The choice of system depends on factors like soil composition, property size, and local regulations. Proper installation, including precise digging and careful placement of components, is crucial for septic drain fields longevity. Homeowners should consult with licensed septic professionals to determine the best system for their property and ensure compliance with local codes and insurance requirements.
The components lay bare before us, a complex system simplified. Now, we must navigate the bureaucratic maze of permits and regulations before breaking ground.
Preparing for Installation: Permits and Regulations

Before installing a septic system, homeowners must navigate local regulations and obtain necessary permits. This process involves checking building codes, securing approvals, and deciding between professional installation or DIY.
Key considerations include Septic Tank Inspections, bedroom count for system sizing, and coordinating with electricians for any required electrical work. Proper preparation ensures a compliant and efficient septic system installation.
Checking Local Building Codes
Before installing a septic tank system, homeowners must check local building codes to ensure compliance. These codes often specify requirements for septic tank placement, septic drain fields size, and minimum distances from water sources. Understanding how to install a septic tank correctly involves familiarizing oneself with these regulations, including those related to Septic Tank Maintenance, which may vary based on factors like the water table and property layout.
To build a septic system that meets local standards, property owners should consult with a local inspector. This professional can guide them through the process of how to build a septic tank and system that adheres to regulations septic tank maintenance. The inspector will review plans, conduct site visits, and provide valuable insights on proper installation techniques. Here’s a typical process for checking local building codes:
- Contact the local health department or building authority
- Request information on septic system regulations
- Schedule a site visit with an inspector
- Review requirements for system design and placement
- Obtain necessary permit applications
Obtaining Necessary Permits
Obtaining the necessary permits is a crucial step in learning how to install a septic tank and drain field. Homeowners must submit detailed plans to their local health department, including information on the proposed system’s location, size, and design. These plans should demonstrate compliance with regulations on how to put in a septic tank, ensuring proper distance from water sources and property lines. Septic Drain Fields
Once plans are approved, property owners can proceed with the septic tank installation process. Understanding how to install a septic drain field and how to build a septic tank maintenance is essential for securing permits. Local authorities may require percolation tests and soil evaluations to ensure the chosen location can effectively treat wastewater. With permits in hand, homeowners can confidently move forward with their septic system installation.
Hiring Professionals vs. DIY Installation
When deciding how to set up a septic tank, homeowners must choose between professional installation and DIY methods. Professional installers like Smart Septic Pros bring expertise in how to install a septic system drainfield, ensuring compliance with local regulations and proper system function. They handle permits, excavation, and equipment placement efficiently, reducing the risk of costly errors. Septic Drain Fields
DIY installation may seem cost-effective, but it requires extensive knowledge of septic systems and local codes. Homeowners attempting to install their own system should thoroughly research how to install a septic system drainfield and Contact local authorities for guidance. For most, professional installation is the safer choice, guaranteeing proper setup and often including services like Septic Tank Pumping. Here’s a comparison of professional vs. DIY installation:
Permits secured, the real work begins. Now, we turn our eyes to the land itself, searching for the perfect spot to birth a new septic system.
Assessing Your Property for Suitability

Assessing property suitability is crucial for proper Septic Tank Installation and maintenance. This section covers evaluating soil conditions through percolation tests, determining the best location for the septic tank, and planning the drain field layout. These steps ensure efficient septic system function and compliance with local regulations, setting the foundation for successful installation and long-term performance.
Evaluating Soil Conditions With a Percolation Test
A percolation test, or “perc test,” is crucial for evaluating soil conditions before Septic Tank Inspections system installation. This test measures how quickly water drains through the soil, determining if the site can effectively filter wastewater Septic Drain Fields. Professionals dig test holes and fill them with water, then measure the rate of absorption over time.
The results of a perc test influence the septic system design and determine if the chosen location is suitable. Soil that drains too quickly or too slowly may require alternative Septic Drain Fields system designs or a different location. Here are the key steps in conducting a percolation test:
- Dig multiple test holes at the proposed drain field site
- Pre-soak the holes to simulate saturated soil conditions
- Fill holes with water and measure the drop in water level over time
- Calculate the percolation rate in minutes per inch
- Compare results to local health department standards
Determining the Best Location for the Septic Tank
Choosing the right location for a septic tank is crucial for its proper function and longevity. Homeowners should consider factors such as soil composition, slope of the land, and distance from water sources. The tank needs to be accessible for Septic Tank Maintenance but far enough from the house to prevent odors and potential health hazards.
Professionals typically recommend placing the septic tank at least 10 feet away from the house and 50 feet from any water source. The area should be free from heavy traffic and large tree roots that could damage the septic tank maintenance system. Proper placement ensures easier access for septic tank pumping and reduces the risk of contamination.
Planning the Drain Field Layout
Planning the drain field layout requires careful consideration of the property’s topography and soil conditions. Septic Tank Inspections system installers typically design the drain field to maximize the soil‘s natural filtration capabilities while ensuring proper distribution of effluent. The layout often consists of a series of trenches or a bed system, with perforated pipes that allow wastewater to seep into the surrounding soil gradually.
The size and configuration of the drain field depend on factors such as household size, daily water usage, and soil percolation rates. Installers must account for local regulations regarding setback distances from property lines, wells, and water bodies. A well-designed drain field helps prevent system overload and ensures effective wastewater treatment, contributing to the longevity and efficiency of the septic system.
With the land assessed, we turn to the tank. The right choice can make or break your system.
Choosing the Right Septic Tank

Selecting the right septic tank is crucial for a well-functioning system. This section compares tank materials like concrete, plastic, and fiberglass, helps determine the appropriate tank size, and considers environmental factors affecting installation. Understanding these elements ensures a septic system that meets household needs and local regulations. Additionally, regular septic tank maintenance, inspections, and repairs are essential for the proper functioning of septic systems and drain fields.
Comparing Tank Materials: Concrete, Plastic, Fiberglass
Septic tank materials Septic Tank Maintenance play a crucial role in system longevity and performance. Concrete tanks, known for their durability, can last up to 40 years with proper maintenance. They resist crushing and shifting, making them ideal for areas with high water tables. However, concrete tanks are heavy and may crack if not installed correctly.
Plastic and fiberglass tanks offer lighter alternatives, simplifying installation and reducing costs. These tanks resist corrosion and are less prone to cracking than concrete. However, they may float in areas with high groundwater and can be damaged by heavy equipment. Homeowners should consider local soil conditions, water table levels, and installation logistics when choosing between concrete, plastic, or fiberglass tanks.
Selecting the Appropriate Tank Size
Selecting the appropriate septic tank size depends on household water usage and local regulations. Typically, tank capacity is based on the number of bedrooms in a home, with a minimum size of 1,000 gallons for a three-bedroom house. Homeowners should consult local health departments for specific requirements Septic Tank Maintenance, as some areas may have stricter guidelines.
Oversizing a septic tank can provide additional treatment time and storage capacity, reducing the risk of system overload. However, an excessively large tank may not maintain the necessary bacterial activity for proper waste breakdown. Smart Septic Pros recommends balancing these factors to ensure optimal septic tank inspections system performance and longevity.
Considering Environmental Factors
Environmental factors play a crucial role in septic tank selection and installation. Soil composition, groundwater levels, and local climate conditions influence the choice of tank material and placement. In areas with high water tables, concrete tanks may be preferred due to their weight and resistance to floating. Conversely, in regions with acidic soil, plastic or fiberglass tanks might be more suitable to prevent corrosion.
Seasonal temperature fluctuations and freeze-thaw cycles can affect septic system performance. In colder climates, tanks may need Septic Tank Repairs to be buried deeper or insulated to prevent freezing. Additionally, local rainfall patterns and drainage characteristics must be considered to ensure proper system function and prevent groundwater contamination. Smart Septic Pros recommends conducting a thorough site assessment to identify potential environmental challenges before finalizing Septic Tank Maintenance selection and installation plans:
The right septic tank chosen, it was time to break ground. Excavators rumbled to life, ready to carve out the earth for our new system.
Essential Points to Remember

Excavating the site for a septic system requires careful planning and execution. This section covers marking the excavation area, implementing safety measures during digging, and ensuring proper depth and dimensions for the tank hole. These steps are crucial for a successful installation that meets local regulations and ensures system efficiency.
Marking the Excavation Area
Marking the excavation area accurately is crucial for proper septic system installation. Professionals use stake flags and spray paint to outline the tank and drain field locations, ensuring compliance with local setback requirements. This step helps prevent damage to underground utilities and preserves the intended system layout.
Before digging begins, Smart Septic Pros recommends contacting local utility companies to mark any buried lines. Homeowners should also consider future landscaping plans when marking the excavation area, as certain plants and structures near the septic system can interfere with its function. Proper marking sets the foundation for a successful installation process.
Safety Measures During Excavation
Safety measures during excavation are crucial to protect workers and prevent accidents. Contractors must establish clear boundaries around the work area, using safety fencing and warning signs to keep unauthorized personnel away. They should also conduct daily safety briefings to ensure all team members are aware of potential hazards and proper procedures.
Proper equipment usage is essential for safe excavation. Operators should wear appropriate personal protective equipment, including hard hats, safety glasses, and steel-toed boots. When using heavy machinery, they must follow manufacturer guidelines and maintain a safe distance from trench edges to prevent cave-ins. Regular equipment inspections and maintenance help minimize the risk of mechanical failures during excavation.
Proper Depth and Dimensions for the Tank Hole
Excavating the tank hole to the proper depth and dimensions is crucial for a successful septic system installation. The hole’s depth typically ranges from 4 to 8 feet, depending on the tank size and local frost line. Contractors must ensure the hole is level and has a firm, compacted base to support the tank‘s weight and prevent settling.
The hole’s dimensions should allow for at least 6 inches of clearance around the tank for backfilling. This space enables proper compaction of soil around the tank, enhancing stability and preventing shifting. Smart Septic Pros recommends using laser levels and precise measurements to achieve accurate excavation, ensuring the tank sits at the correct slope for optimal waste flow:
The ground lay open, raw and ready. Now came the tank, heavy with promise and purpose.
Installing the Septic Tank
Installing the septic tank is a critical phase in setting up a reliable septic system. This section covers positioning the tank correctly, ensuring it’s level and stable, and connecting the inlet and outlet pipes. Proper installation guarantees optimal system performance and longevity, making each step crucial for homeowners and professionals alike.
Positioning the Tank Correctly
Correctly positioning the septic tank is crucial for optimal system performance. Installers must place the tank on a level, compacted surface, ensuring it sits at the right depth and angle for proper waste flow. The tank‘s location should allow easy access for maintenance while maintaining required distances from structures and water sources.
Proper tank positioning also involves aligning the inlet and outlet pipes correctly. Installers use laser levels and string lines to achieve precise placement, ensuring the tank slopes slightly towards the outlet. This careful positioning prevents backflow issues and promotes efficient waste separation within the tank, contributing to the overall effectiveness of the septic system.
Leveling and Stabilizing the Tank
Leveling and stabilizing the septic tank is crucial for proper system function. Installers use a laser level to ensure the tank sits perfectly horizontal, with a slight tilt towards the outlet. They carefully adjust the gravel bed beneath the tank, adding or removing material as needed to achieve the correct level.
Once level, the tank requires stabilization to prevent shifting. Installers backfill around the tank with layers of gravel or sand, compacting each layer to provide solid support. This process ensures the tank remains in place, even in areas with high water tables or during heavy rainfall. Here’s a step-by-step guide for leveling and stabilizing a septic tank:
- Place a layer of gravel or sand in the excavated hole
- Lower the tank into position using appropriate lifting equipment
- Check tank level with a laser level, adjusting as necessary
- Begin backfilling around the tank in 6-inch layers
- Compact each layer thoroughly before adding the next
- Continue until the backfill reaches the tank‘s inlet and outlet pipes
Connecting Inlet and Outlet Pipes
Connecting the inlet and outlet pipes is a critical step in septic tank installation. Installers must ensure a watertight seal between the pipes and the tank to prevent leaks and groundwater infiltration. They use flexible rubber boots or gaskets to create a secure connection, allowing for slight movement without compromising the seal.
Proper pipe alignment is essential for efficient waste flow. The inlet pipe should be positioned slightly higher than the outlet pipe to promote gravity flow through the tank. Installers carefully measure and adjust the pipe angles, typically aiming for a 1/4 inch drop per foot of pipe length. This precise alignment helps maintain proper waste separation within the tank and facilitates smooth flow to the drain field.
The tank settled into its earthen cradle. Now came the crucial task of creating its lifeline, the drain field.
Setting Up the Drain Field

Setting up the drain field is a crucial step in septic system installation. This process involves laying perforated pipes to distribute wastewater, adding gravel or aggregate material for filtration, and properly covering the drain field. Each step ensures efficient wastewater treatment and system longevity. Proper setup prevents soil saturation and promotes effective waste breakdown.
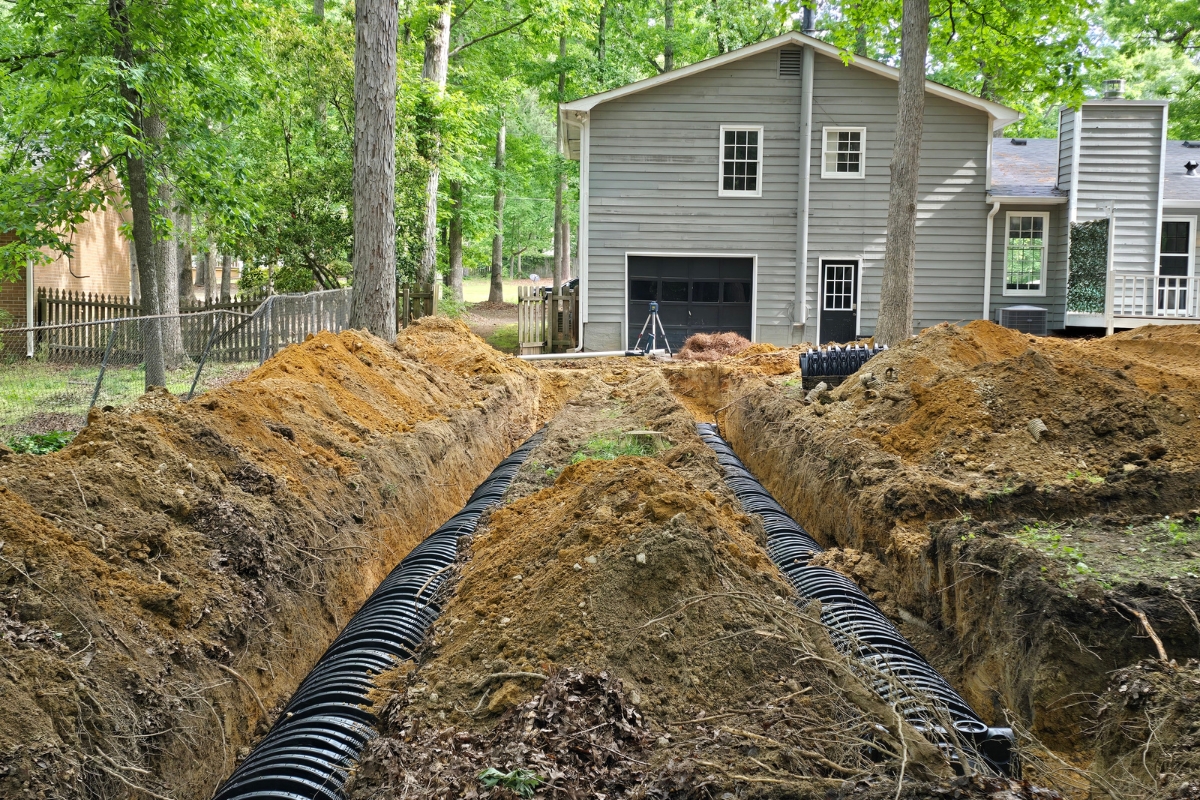
Laying Perforated Pipes
Laying perforated pipes is a crucial step in setting up an effective drain field. Installers carefully position these pipes in trenches, ensuring they maintain a slight downward slope to facilitate wastewater distribution. The pipes are typically made of PVC or polyethylene and feature small holes or slits that allow effluent to seep into the surrounding soil gradually.
Proper pipe placement requires attention to detail and adherence to local regulations. Installers space the pipes evenly across the drain field, considering factors such as soil type and expected water flow. They often use laser levels to achieve the correct slope, typically aiming for a drop of 1/8 to 1/4 inch per foot of pipe length to ensure optimal distribution without overwhelming any single area of the drain field.
Adding Gravel or Aggregate Material
Adding gravel or aggregate material is a critical step in drain field setup. Installers carefully layer these materials around the perforated pipes to create a filtering system for wastewater. The gravel helps distribute effluent evenly and provides space for beneficial bacteria to thrive, enhancing the natural treatment process.
The type and size of aggregate material used can impact the drain field’s efficiency. Installers typically use washed stone or gravel ranging from 3/4 to 2 1/2 inches in diameter. They ensure a minimum of 6 inches of gravel below the pipes and 2 inches above, creating an effective filtration zone. Here’s a breakdown of typical aggregate layers in a drain field:
Covering the Drain Field Properly
Properly covering the drain field is crucial for its long-term functionality. After placing the gravel and pipes, installers carefully lay a geotextile fabric over the entire area. This fabric acts as a barrier, preventing soil from entering the gravel layer while allowing water to pass through, maintaining the drain field’s effectiveness.
The final step involves backfilling with native soil, creating a slight mound to encourage surface runoff. Installers avoid compacting this soil to maintain its permeability. They often recommend planting shallow-rooted grass over the drain field to prevent erosion and enhance water absorption, ensuring the system operates efficiently for years to come.
The drain field set, we moved to the final phase. It was time to bring the system to life by connecting it to the house.
Connecting the System to Household Plumbing

Connecting the septic system to household plumbing is a critical step in installation. This section covers linking household pipes to the septic tank, ensuring correct pipe slope and alignment, and sealing and inspecting joints. Proper connections prevent leaks and ensure efficient waste flow, making these steps essential for a well-functioning septic system.
Linking Household Pipes to the Septic Tank
Linking household pipes to the septic tank requires careful planning and execution. Plumbers typically use 4-inch PVC pipes to connect the main sewer line from the house to the septic tank inlet. They ensure a proper slope of at least 1/4 inch per foot to facilitate waste flow and prevent clogs.
Installers use flexible couplings at strategic points to allow for slight movement and prevent pipe breakage due to settling. They also install cleanouts at key locations for easy access during maintenance. Here’s a breakdown of the typical connection process:
Ensuring Correct Pipe Slope and Alignment
Ensuring correct pipe slope and alignment is crucial for optimal septic system function. Installers use laser levels and string lines to achieve the recommended slope of 1/4 inch per foot, allowing waste to flow smoothly from the house to the tank. They carefully grade the trench bottom, adding or removing soil as needed to maintain this consistent slope throughout the pipe run.
Proper alignment involves keeping pipes straight and minimizing bends or turns. When changes in direction are necessary, installers use long-sweep elbows to reduce flow resistance. They also ensure pipes are properly supported along their entire length, using compacted soil or gravel to prevent sagging or settling that could disrupt the carefully calculated slope.
Sealing and Inspecting Joints
Sealing and inspecting joints is crucial for preventing leaks and ensuring the longevity of the septic system. Installers use PVC cement and primers to create watertight seals at each pipe connection, carefully following manufacturer guidelines for application and drying times. They pay special attention to joints near the tank inlet and outlet, as these areas are prone to stress from settling and movement.
After sealing, a thorough inspection is conducted to verify the integrity of all connections. Installers often use water tests or specialized cameras to check for leaks or misalignments. This inspection process includes:
- Visual examination of each joint for proper alignment
- Pressure testing of the entire pipe system
- Camera inspection to detect hidden issues
- Verification of proper slope and flow
The pipes connected. The system stood ready.
Backfilling and Site Restoration

Backfilling and site restoration are crucial final steps in septic system installation. This section covers selecting suitable backfill material, proper soil compaction techniques, and effective landscaping restoration. These processes ensure system stability, prevent settling issues, and protect against erosion, completing the installation with a focus on long-term functionality and site aesthetics.
Backfilling With Suitable Material
Backfilling a septic system requires careful selection of suitable materials to ensure stability and proper drainage. Installers typically use native soil for the majority of backfill, but they often mix in sand or gravel near the tank and drain field to improve water flow. This combination helps prevent soil compaction around critical components while maintaining the system’s integrity.
The backfilling process usually begins with a layer of sand or fine gravel around the tank and pipes to protect them from damage. Installers then add layers of native soil, carefully compacting each layer to prevent future settling. They avoid using clay-heavy soils or materials containing large rocks, as these can lead to uneven settling or damage to the system components over time.
Compacting Soil to Prevent Settling
Proper soil compaction during backfilling is essential for preventing future settling issues around the septic system. Installers use mechanical compactors to compress each layer of soil, typically working in 6-inch increments. This methodical approach ensures uniform density throughout the backfill, reducing the risk of sinkholes or uneven surfaces that could compromise the system’s integrity.
While compacting, installers pay special attention to areas around pipes and the septic tank, using hand tampers for precision. They maintain a careful balance, compacting enough to prevent settling but not so much as to damage system components. This process often requires multiple passes with compaction equipment, gradually building up layers until the original ground level is restored.
Restoring Landscaping and Preventing Erosion
Restoring landscaping after septic system installation is crucial for both aesthetic and functional reasons. Installers typically regrade the area to ensure proper drainage away from the system components. They then spread topsoil over the disturbed areas, creating a smooth surface for planting grass or shallow-rooted vegetation.
Preventing erosion is a key consideration during site restoration. Installers often use erosion control measures such as straw mulch, erosion control blankets, or hydroseeding to stabilize the soil quickly. These methods help protect the newly installed system from runoff and promote rapid vegetation growth. For long-term erosion prevention, they may recommend a landscaping plan that includes:
- Native grasses and plants with shallow root systems
- Strategically placed rocks or gravel to redirect water flow
- Terracing on sloped areas to reduce runoff velocity
- Installation of French drains or swales for improved drainage
The earth settled back into place, covering the new system. Now came the moment of truth: final inspection and testing.
Final Inspection and Testing

Final site assessment and testing are crucial steps in septic system installation. This phase involves checking for leaks and proper flow, obtaining approval from local authorities, and setting up a maintenance schedule. These processes ensure the system functions correctly, complies with regulations, and remains in good condition for years to come.
Checking for Leaks and Proper Flow
Checking for leaks and proper flow is a critical step in the final inspection of a septic system. Installers typically perform a water test, filling the tank and observing the inlet and outlet pipes for any signs of leakage. They also examine the connections between the house and tank, ensuring all joints are secure and watertight.
To verify proper flow, technicians often use dye tests or camera inspections. They introduce a non-toxic dye into the system and monitor its progress through the pipes and into the drain field. This process helps identify any blockages or improper slopes that could impede waste movement. Proper flow ensures efficient waste treatment and prevents backups, contributing to the longevity of the septic system.
Obtaining Approval From Local Authorities
Obtaining approval from local authorities is the final hurdle in septic system installation. Homeowners or contractors must schedule an inspection with the local health department or building authority. These officials review the system’s components, ensuring compliance with regulations and proper installation techniques.
During the inspection, officials typically check tank placement, drain field layout, and pipe connections. They may also conduct flow tests to verify system functionality. If the installation meets all requirements, the inspector issues an approval certificate, allowing the system to be put into use. Here’s a breakdown of the approval process:
Setting Up a Maintenance Schedule
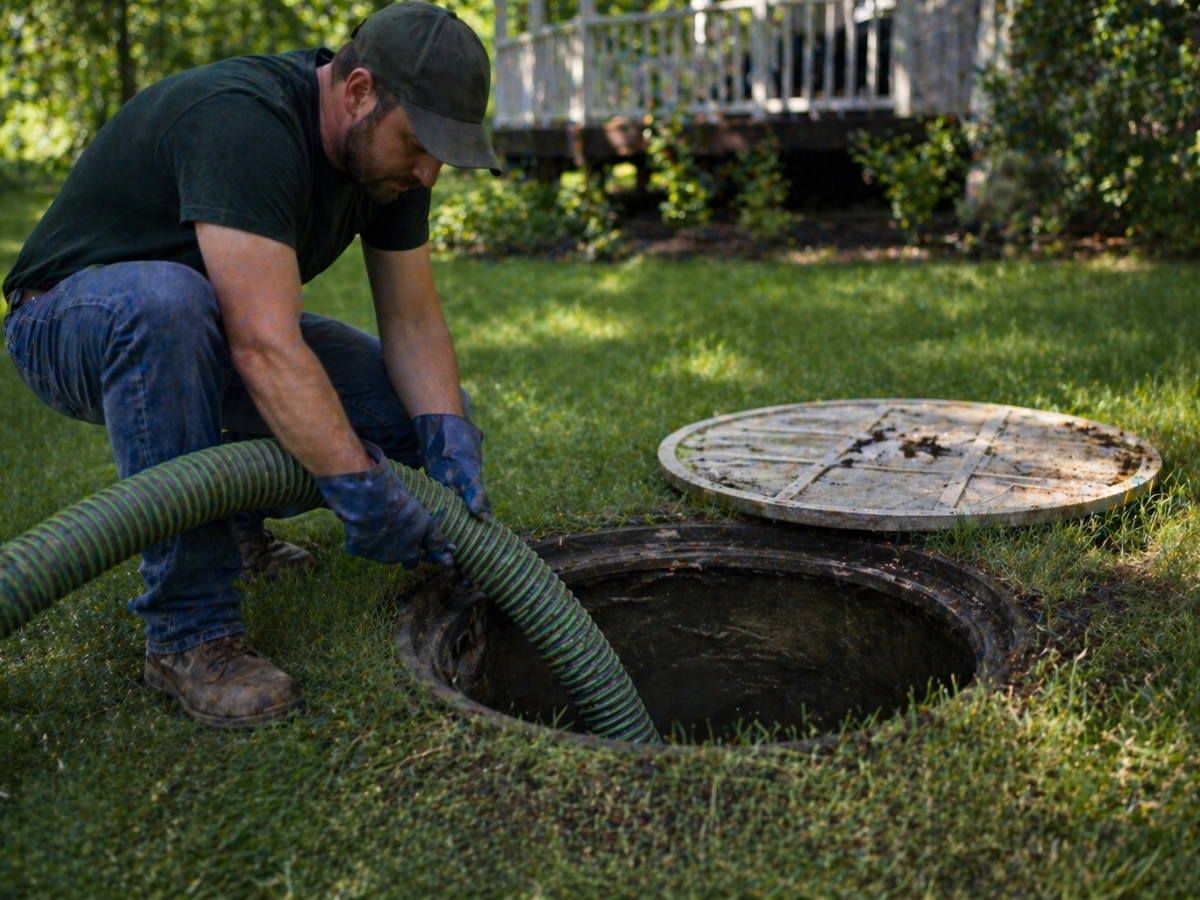
Setting up a maintenance schedule is crucial for the longevity and efficiency of a newly installed septic system. Homeowners should work with their installers or local septic professionals to create a customized plan that includes regular inspections, pumping, and system checks. This schedule typically includes annual inspections to assess the tank‘s sludge levels and overall system performance.
A comprehensive maintenance schedule should outline specific tasks and their frequency. This may include septic tank pumping every 3-5 years, drain field inspections, and checking for signs of system stress. Homeowners can use this schedule to stay proactive in their septic system care, preventing costly repairs and ensuring optimal performance. Here’s a sample maintenance schedule:
Frequently Asked Questions
How long does it typically take to install a septic system?
The installation of a septic system typically takes 3-5 days, depending on factors like soil conditions, system size, and weather. Smart Septic Pros in Acworth, Georgia, can efficiently complete the process, including excavation, tank placement, and drain field installation.
What factors determine the size of septic tank I need?
The size of your septic tank depends on several factors, including the number of bedrooms in your home, daily water usage, soil type, and local regulations. Smart Septic Pros of Acworth can assess these factors and recommend the appropriate tank size for your property’s specific needs.
Do I need professional help to install a septic system?
Yes, professional help is essential for septic system installation. Certified experts like Smart Septic Pros in Acworth, Georgia, ensure proper design, permitting, excavation, and installation. Their expertise guarantees compliance with local regulations and optimal system performance for your property.
How often should a septic system be inspected after installation?
Septic systems should be inspected annually after installation to ensure proper functioning. However, some experts recommend more frequent inspections during the first year. Regular inspections help catch issues early, prevent costly repairs, and extend the system’s lifespan. Consult a professional for personalized advice based on your specific system and usage.
What are the signs that my septic system isn’t working properly?
Signs of a malfunctioning septic system include slow draining, gurgling pipes, foul odors, wet spots in the yard, sewage backup, and lush vegetation over the drain field. If you notice any of these issues, contact Smart Septic Pros of Acworth, Georgia, for professional inspection and repair.
Conclusion
Installing a septic system correctly is crucial for proper waste management and environmental protection. This step-by-step guide emphasizes the importance of thorough planning, adherence to local regulations, and professional expertise throughout the installation process.
From assessing property suitability to final inspection and testing, each phase plays a vital role in ensuring a functional, long-lasting septic system. If you’re looking for septic tank installation in Kennesaw, Acworth, Marietta, or the metro Atlanta area, choose Smart Septic Pros. By contacting septic professionals and maintaining a regular maintenance schedule, homeowners can protect their investment and contribute to a healthier environment. Request service today by calling 678-993-4545.